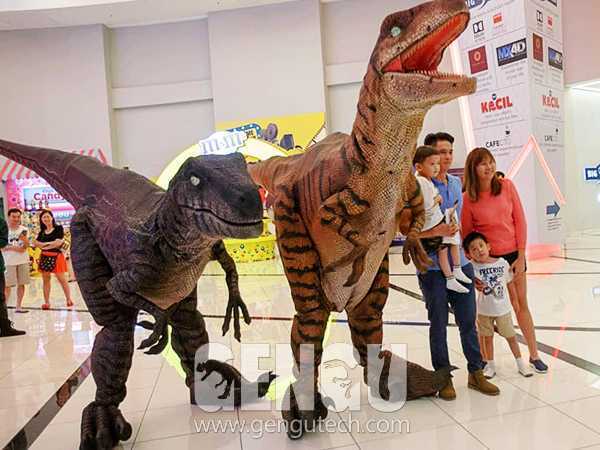
How to make a realistic dinosaur costume?
Introduction
The fascination with dinosaurs has captivated people for generations. While we can't travel back in time to witness these magnificent creatures in person, we can bring a piece of their world into our own through the art of costume-making. Creating a realistic dinosaur costume is an exciting and creative endeavor that combines imagination, craftsmanship, and attention to detail. In this guide, we will explore the step-by-step process of making a lifelike dinosaur costume that will transport you and others to a prehistoric realm.

Step 1: Research and Design
Before diving into the construction process, thorough research is essential. Study various dinosaur species to choose the one you'd like to bring to life. Consider factors like size, shape, color, and texture. Websites, books, and documentaries can provide valuable visual references. Sketch out your costume design, noting important features like the head, body, limbs, and tail. This stage is crucial for ensuring accuracy and realism in your creation.
Step 2: Materials Selection
Selecting the right materials is crucial for achieving a lifelike appearance. Foam, fabric, and other textiles are commonly used. For the base structure, foam is a versatile choice. High-density foam can be carved and shaped into the desired form. Look for reference images to determine the appropriate thickness and density for each part of the costume. Additionally, choose fabrics that resemble the dinosaur's skin texture and color. The combination of materials will contribute significantly to the final realism of the costume.
Step 3: Creating the Structure
Start building the costume's structure by working on the frame. Begin with the head and work your way down to the body, limbs, and tail. Use the foam to carve out the basic shapes. Attach these pieces together using a strong adhesive or, for larger sections, consider using a lightweight, flexible wire frame as a skeleton. This approach will allow for movement and flexibility while maintaining stability.
Step 4: Sculpting and Detailing
With the basic structure in place, it's time to add the intricate details that will make your dinosaur costume come to life. Use additional layers of foam to build up muscle definition, scales, and other unique features. Sculpt the head with care, paying close attention to the eyes, mouth, and teeth. A heat gun can be used to shape and mold foam, creating more organic forms.
To enhance the realism, consider incorporating textures by using tools like wire brushes, sculpting tools, and sandpaper. These tools will help you achieve the rough, weathered appearance characteristic of ancient reptilian creatures.
Step 5: Skin Texturing
Applying the skin texture is a pivotal step in making your costume look authentic. Depending on the dinosaur species you're recreating, the texture can range from rough scales to smoother skin with patches of scales. Create texture stamps using rubber mats, sponges, or even carved potatoes, and apply them to the foam surface with paint or a flexible adhesive. Experiment with different techniques and colors to achieve a visually convincing effect.
Step 6: Painting and Coloring
Painting is where the magic truly happens. Choose a color palette that matches the researched appearance of your chosen dinosaur. Begin with a base coat and gradually layer on various shades to create depth and dimension. Add darker colors to recessed areas and lighter shades to raised portions to mimic the natural play of light on the skin. Acrylic paints are a popular choice due to their versatility and ability to adhere well to foam and fabric surfaces.
Step 7: Eyes and Teeth
The eyes and teeth are focal points of any dinosaur costume. Craft the eyes using a combination of painted foam and clear acrylic or plastic for a lifelike gleam. Attach the eyes securely to the head, ensuring they are positioned realistically.
Creating convincing teeth involves carving and shaping foam or even using lightweight, durable materials like resin. Paint them to resemble actual teeth, keeping in mind the species you are replicating. Properly placed and detailed eyes and teeth can breathe life into your costume.
Step 8: Mobility and Comfort
As you near completion, it's important to address the practical aspects of wearing the costume. Ensure that the wearer has a clear field of vision and that there are adequate ventilation and cooling mechanisms to prevent discomfort. Incorporate lightweight materials to make movement as fluid as possible. Depending on your costume's design, consider adding padding for comfort and support.
Step 9: Final Touches
The last step involves assessing your costume for any finishing touches. Look for areas where the paint might need touch-ups, ensure all attachments are secure, and double-check that the overall appearance aligns with your initial design. Test the costume's mobility and make any necessary adjustments to guarantee ease of movement.
Conclusion
Creating a realistic dinosaur costume is an artistic journey that combines science, imagination, and craftsmanship. Through diligent research, careful material selection, and meticulous detailing, you can bring these ancient creatures back to life, if only for a moment. As you step into your masterpiece, you'll not only embody a dinosaur but also carry the spirit of creativity and wonder that drove you to recreate a piece of history. So, unleash your inner paleontologist, channel your artistic flair, and embark on this extraordinary adventure into the past.


Comments
Please Join Us to post.
0